云天

我是云天,你好呀


  • 首页

  • 关于

  • 标签

  • 归档

  • 读书

代码分离

发表于 2018-06-07

一、为什么要进行代码拆分

在以往的性能优化清单中,减少HTTP请求一直是其中的一项。事实上,也做到了。在目前的大多数应用开发中都会用到 webpack 进行应用的构建打包,从而将我们应用以及应用所需的模块打包成一个大 bundle。这样也确实是减少了HTTP的请求。但是这样做有几个明显的劣势:

  1. 首屏加载时间过长,导致白屏,移动端网络不稳定尤甚
  2. 当你修改了业务代码以后,整个大的 bundle 要重新下载。

二、怎样对代码进行拆分

先看一下 webpack 进行代码分离的几种方法:

  • 在入口处配置 entry 进行分离
  • 防止重复,使用CommonsChunkPlugin去重和分离chunk
  • 动态导入:使用模块的内联函数

1、在入口处配置进行分离

1
2
3
4
entry: {
app: './src/entry.js',
vendor: ['react', 'react-dom']
},

对于一些不常变动的库,比如框架,第三方依赖等等,可以直接在入口就进行代码的分离,就好比这里的react、react-dom

2、防止重复,使用 CommonsChunkPlugin

这个插件可以将公共模块依赖提取到已有的chunk中,比如下面这样

1
2
3
new webpack.optimize.CommonsChunkPlugin({
name: 'common',
}),

当然,这个插件在webpack4.0以上的版本被废弃掉了,具体的可以查看SplitChunksPlugin

3、使用import()来进行动态导入

import()的相关文档可以查看import()相关文档

当然,使用import()需要用到babel-plugin-syntax-dynamic-import插件

import()的使用如下:

1
2
3
import('lodash').then(_ => {
// do something
})

但这样写的话,每次都很麻烦,这里有一个高阶组件来处理这个事情

1
2
3
4
5
6
7
8
9
10
11
12
13
14
15
16
17
18
19
20
21
22
23
import React from 'react';

export default function asyncComponent(importComponent) {
class AsyncComponent extends React.Component {
constructor(props){
super(props);
this.state = {
Component: null,
}
}
componentDidMount() {
importComponent().then(module => {
// const { default: component } = res;
this.setState({ Component: module.default });
});
}
render(){
const { Component } = this.state;
return Component ? <Component { ...this.props } /> : null;
}
}
return AsyncComponent;
}

有了这个高阶组件,使用就方便了:

1
const Result = asyncComponent(() => import('./container/result/result'))

import规范不允许控制模块的名称或其他的属性,因为chunks是webpack的概念。如果像上面那样直接使用的话,输出的就像下面这样

图片

好在webpack可以注释接受一些特殊的参数,但还要在配置文件的output加上chunkFilename

1
2
3
4
5
6
7
8
9
// 第一处修改
const Result = asyncComponent(() => import(/* webpackChunkName: "result" */ './container/result/result'))
// 第二处修改
output: {
path: '/',
publicPath: '/',
chunkFilename: '[name].bundle.js',
filename: '[name].[hash].js',
},

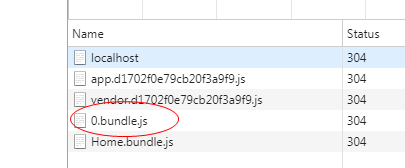
这样,上面的模块就会被命名为result.bundle.js,而不是[id].bundle.js。

其实做到这一步,就已经做到了代码拆分。但是有一个比较好的库更适合做这个事情,这个库就是react-loadable,使用如下:

1
2
3
4
5
6
const Home = Loadable({
loader: () => import(/* webpackChunkName: "Home" */ './container/Home/home'),
loading: () => {
return <div>loading</div>
},
})

有的组件加载实在过快(<200ms),那么这个我们可以给一Loading组件来设置延迟时间

1
2
3
4
5
6
7
8
9
function Loading(props) {
if (props.error) {
return <div>Error! <button onClick={ props.retry }>Retry</button></div>;
} else if (props.pastDelay) {
return <div>Loading...</div>;
} else {
return null;
}
}

接着使用react-loadable

1
2
3
4
5
const Home = Loadable({
loader: () => import(/* webpackChunkName: "Home" */ './container/Home/home'),
loading: Loading,
delay: 200, // 200ms内加载出来的话,不显示加载状态
})

想了解更多react-loadable,可以点击react-loadable

完整代码

1
2
3
4
5
6
7
8
9
10
11
12
13
14
15
16
17
18
19
20
21
22
23
24
25
26
27
28
29
30
31
32
33
34
35
36
37
38
39
import React from 'react';
import { Route, Router, BrowserRouter, HashRouter, Switch, Redirect } from 'react-router-dom';
import { ConnectedRouter } from 'react-router-redux';
import createHistory from 'history/createHashHistory';
import App from './container/app';
import Loadable from 'react-loadable';

const Home = Loadable({
loader: () => import(/* webpackChunkName: "Home" */ './container/Home/home'),
loading: () => {
return <div>loading</div>
}
})

const Result = Loadable({
loader: () => import(/* webpackChunkName: "result" */ './container/result/result'),
loading: () => {
return <div>loading...</div>
}
})

const history = createHistory();

class Routers extends React.Component {
render() {
return (
<HashRouter>
<App>
<Switch>
<Route exact path="/" render={() => (<Redirect to="/home" />)} />
<Route path="/home" component={Home} />
<Route path="/second" component={Result} />
</Switch>
</App>
</HashRouter>
)
}
}
export default Routers;

最后

代码拆分有两种思路,一种是基于路由拆分,一种是基于组件拆分

图片描述

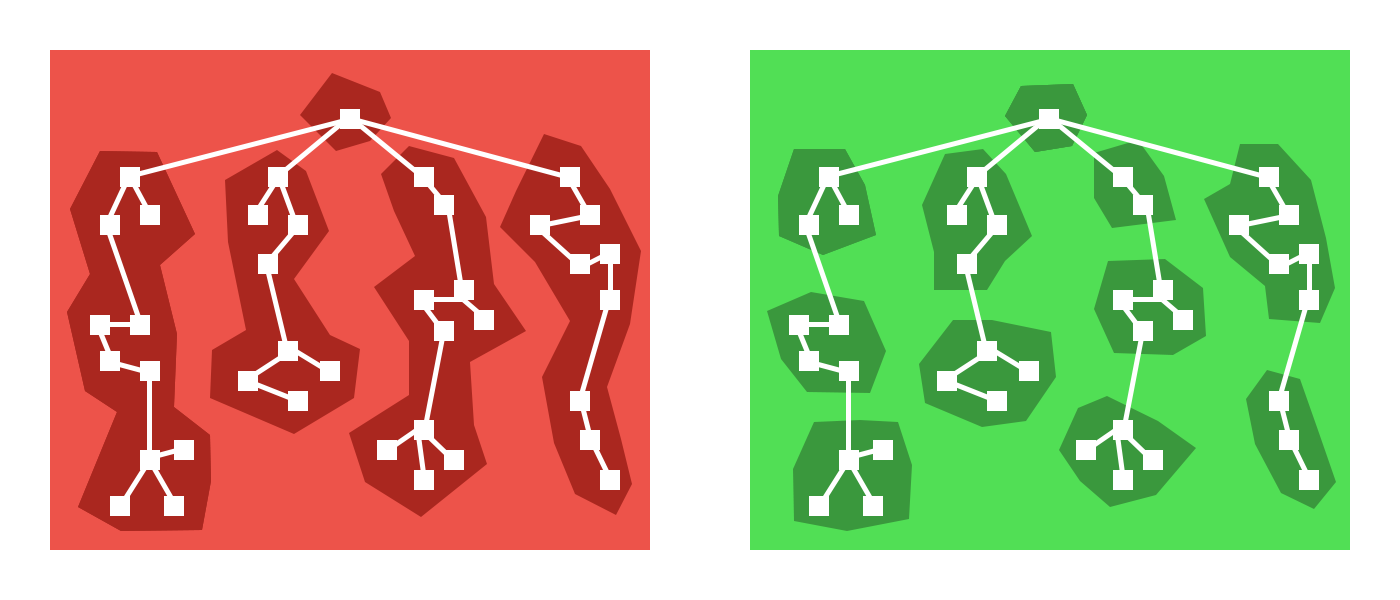
左边这幅图是基于路由拆分的示意图,右边的是基于组件拆分的示意图,可以看到基于组件进行拆分的粒度更细一点。

考虑这样一个场景,你有多个tab,可能有一些tab你从进入应用到离开应用都不会去点击它,那么每个tab页面下的组件就很适合进行代码拆分。这完全根据你的应用场景来决定的。

如果你想对你的一些组件进行拆分,也是同样的使用react-loadable

浅谈闭包

发表于 2018-06-07

一、现状

闭包是jser绕不过的坎,一直在都在说,套用 simpson 的话来说:JavaScript中闭包无处不在,你只需要能够识别并拥抱它。

闭包是基于词法作用域书写代码时的自然结果,你甚至不需要为了利用它们而有意识的去创建闭包。闭包的创建和使用在你的代码中随处可见。你缺少的只是根据你的意愿来识别、拥抱和影响闭包的思维环境

二、什么是闭包(closure)

当函数可以记住并访问所在的词法作用域时,就产生了闭包。即使函数是在当前词法作用域之外执行 –《你不知道的js》(上卷)

闭包是指有权访问另一个函数作用域中的变量的函数 –《JavaScript高级程序设计》

先来看一个例子:
例子1:

1
2
3
4
5
6
7
8
9
10
function foo(){
var a = 2;

function bar(){
console.log(a); // 2
}
bar();
}

foo()

这是闭包吗?
这个代码从技术上来说是,但也可以说不是。准确的来说bar()对a的引用的方法是词法作用域的查找规则。我们再来看:
例子2:

1
2
3
4
5
6
7
8
9
10
11
function foo(){
var a = 2;

function bar(){
console.log(a)
}

return bar;
}
var baz = foo();
baz(); // 2, 这就是闭包了

在例2中,我们将bar()函数本身当做一个值类型进行传递,函数bar()能够访问foo()的内部作用域。在这个例子中,它在自己定义的词法作用域以外的地方执行。

三、怎么形成的

要了解清楚,得先了解几个概念

  • 作用域链(scope chain)
  • 词法作用域

词法作用域

每个函数都有自己的执行环境。这个环境可以访问外部环境,以此类推。每个环境能访问到的标识符集合,称之为 作用域,也就是词法作用域。

作用域链(scope chain)

将作用域一层一层的嵌套,就形成了作用域链

如下,通常我们都希望 foo() 在执行完成以后,整个的内部作用域都被销毁。因为我们知道引擎有垃圾回收机制用来释放不再使用的内存空间。由于看上去 foo()的内容不会再被使用,所以很自然的想到会对其回收。但是,事实上内部作用域依然存在

1
2
3
4
5
6
7
8
9
10
11
var globalVar = 10;
function foo() {
var fooVar = 20;
function bar() {
var barVar = 30;
return globalVar + fooVar + barVar;
}
return bar;
}
var baz = foo();
baz();

如上,用一张图表示
作用域链

这个作用域链在函数创建的时候就保存起来了。

baz()函数在执行的时候(执行bar函数),将当前的变量对象(由于当前的环境是函数,所以将其活动对象作为变量对象)添加到作用域链的前端。此时,由于bar在执行,而作用域链也存在,所以可以在作用域链上进行查找,去访问foo的变量。

四、闭包的应用场景有哪些

  • 创建私有变量或函数

五、闭包的缺点

  • 闭包中的值是存在于内存中,滥用的话会导致内存消耗过大

闭包经典问题

1
2
3
4
5
6
7
8
9
10
// 函数作用:希望它返回一个数组。该数组的元素为遍历的索引值
function hello(){
var res = [];
for (var i = 0,len = 5;i < len;i++){
res[i] = function () {
return i;
}
}
return res;
}

返回的结果跟我们期待的不一样,因为:闭包保存的是整个变量对象,而不是每个变量。
解决方案:

1
2
3
4
5
6
7
8
9
function hello(){
var res = [];
for (var i = 0,len = 5;i < len;i++){
res[i] = (function(i){
return i;
})(i)
}
return res;
}

这里,没有没有把闭包直接赋值给数组。而是定义了一个匿名函数,并且将立即执行该匿名函数的结果赋值给数组,由于参数是按值传递的,所以会将当前值传给参数num。

参考资料:《你不知道的js》(中卷)、《JavaScript高级程序设计》

完

css居中总结

发表于 2018-05-20

一、水平居中系列

  1. inline或者inline-*元素

    1
    2
    3
    .center-children {
    text-align: center;
    }

    inline、inline-block、inline-table、inline-flex等有效

  2. 一个块级元素

    1
    2
    3
    .center{
    margin:0 auto;
    }
  3. 多个块级元素

    使用inline-block和text-align配合或者使用flex

二、垂直居中系列

  1. inline或者inline-*元素
    1、单行:上下添加相等的内边距

    1
    2
    3
    4
    .link {
    padding-top: 30px;
    padding-bottom: 30px;
    }

    2、多行:

    1
    2
    3
    4
    5
    6
    7
    8
    9
    10
    11
    12
    13
    14
    15
    16
    17
    // 可以模拟表格
    .center-table{
    display:table;
    }
    .center-table children{
    display:table-cell;
    vertical-align:center;
    }
    ```
    ```css
    // 可以使用flexbox
    .flex-center-vertically {
    display: flex;
    justify-content: center;
    flex-direction: column;
    height: 400px;
    }
  1. 块级元素
    1). 知道块级元素的高度

    1
    2
    3
    4
    5
    6
    7
    8
    9
    10
    .parent {
    position: relative;
    }
    .child {
    position: absolute;
    top: 50%;
    height: 100px;
    margin-top: -50px;
    box-sizing: border-box; */
    }

    2). 不知道块级元素的高度

    1
    2
    3
    4
    5
    6
    7
    8
    .parent {
    position: relative;
    }
    .child {
    position: absolute;
    top: 50%;
    transform: translateY(-50%);
    }

    3). 使用flexbox

    1
    2
    3
    4
    5
    .parent {
    display: flex;
    flex-direction: column;
    justify-content: center;
    }

三、居中(垂直和水平)

  1. 固定宽度和高度

    1
    2
    3
    4
    5
    6
    7
    8
    9
    10
    11
    12
    13
    14
    15
    .parent {
    position: relative;
    }

    .child {
    width: 300px;
    height: 100px;
    padding: 20px;

    position: absolute;
    top: 50%;
    left: 50%;

    margin: -70px 0 0 -170px;
    }
  1. 不知道宽度和高度

    1
    2
    3
    4
    5
    6
    7
    8
    9
    .parent {
    position: relative;
    }
    .child {
    position: absolute;
    top: 50%;
    left: 50%;
    transform: translate(-50%, -50%);
    }
  1. 使用flexbox

    1
    2
    3
    4
    5
    .parent {
    display: flex;
    justify-content: center;
    align-items: center;
    }

云天

3 日志
5 标签
© 2018 云天
由 Hexo 强力驱动
|
主题 — NexT.Gemini v5.1.4